Thursday, December 31, 2020

Why Professional Carpet Cleaning Is Important

Brisbane Carpet Cleaning experts share their knowledge on why regular carpet cleaning has a positive impact in many ways.

As the weather warms and people head outdoors and the humidity levels in Queensland increase dramatically
Good airflow and keeping mould spores to a minimum is important to keep your carpeted areas looking, feeling and smelling fresh all year round


Improve the Life Expectancy of the Carpet

Carpets are one of the most important elements of interior design. With the amount of foot traffic, it receives, it is necessary you clean them regularly to ensure optimum health.

Avoid dust accumulations that cause fading and breaking down of the fibre. Give your investment a proper Steam Cleaning Service from professional carpet cleaners. With regular maintenance, not only does your carpet appear clean and spotless, but will have improved durability.


Prevent your carpet from harming your health

Protects indoor air quality. Carpets trap airborne pollutants; however, eventually those pollutants must be removed in order to protect the carpet and maintain indoor air quality.

Carpets may become harmful to the health of your family and guests. They can attract allergens, spread bacteria, and expose you and your family to pollutants. In a home with young children, pets, or even the elderly, regular carpet cleaning is essential.

For best results, we suggest vacuuming your carpet 1-5 times a week and hire a professional at Vegas Cleaners to come in and steam clean your carpet 1-2 times a years. This will keep your carpet looking good, smelling good, and help you retain its value.


Makes carpets easier to maintain.

Most carpet soiling is made up of dry soils; when carpets are kept thoroughly cleaned on a regular basis, most dry soils can be removed with regular vacuuming.

Regular cleaning of your commercial carpets will actually extend their lifespan by about two years, so surely it's worth doing. Thanks to powerful cleaning machines and vacuums, your carpets will be deep down clean, any flattened fibres will be raised, and your carpets will feel lovely underfoot once more.


Removes spots and stains.

As with other soils, spots and stains can attract more soiling. Removing them promptly protects carpeting from damage.

Spot cleaning is a good practice to keep your carpet looking good, both in the short term as well as the long term.

Some people avoid doing spot cleaning because they think that if they were to do it them selves, they may damage the carpet. While this could be true, if you do not over-do it, the benefits outweigh the risks.

If you remove a spill as soon as it happens, you minimize the risk of the substance permanently staining the carpet. Also, if the spillage is not removed from the carpet, other dust and dirt can stick to it making it look worse.

Usually, when attempting to remove a spillage as soon as it happens, all you need is a damp cloth avoiding the use of any cleaning agent or chemicals.

If the damp cloth does not do the trick, a small amount of detergent will normally remove a recent spillage. The key is to use a very mild detergent and not to use much of it. It does not take much at all when the spillage has just happened. Also, if you use too much, it can leave a sticky residue to which other dirt and dust can stick.


Prevents buildup of allergens and bacteria

Moist soiling of carpets can result in the buildup of several unhealthy contaminants.

While it's much easier to vacuum around the home than hiring a carpet cleaning service , a vacuum will only remove surface dirt. So all that debris that has become embedded with the fibers will stay there until it receives professional treatment.

Over time, this will cause excess wearing on the fibers, deteriorating faster. Bacteria in the carpet can also create odors, making it more difficult to breathe for those battling asthma or allergies.


Enhances the appearance of any room

Clean, well-maintained carpets speak volumes about the overall cleanliness of a home or facility.
Getting your carpets cleaned by a professional not only helps to keep your home looking better, it actually has added health benefits.
Many of the dust and dirt particles that build up in carpets can be irritants which can lead to allergies. Common allergies associated with dust are skin issues such as eczema.
A build up of dust and dirt in the home can also exacerbate breathing conditions, such as asthma.
Only deep cleaning can remove irritants sufficiently.

Your carpets are often the first thing a guest will notice when they enter your home. Another added benefit of ensuring that your carpets are not just clean, but hygienically clean, means that all bad odours are also removed. This is particularly advisable for households with pets, where fur and urine can often mar the look and smell of your home.


Improves everyones morale when in a clean environment

People feel better when their home or work environment is clean. This includes the carpeting.

Everyone wants to ensure their family members, employees and/or customers are healthy and comfortable.
When you have your carpets well maintained and professionally cleaned you are improving the overall indoor air quality (IAQ) of your spaces.
The threat posed by mold, mildew, mites and other pollutants is not just that they can stick in the carpet; they can get into the air and float around as well.
Those with pets may also experience dander, pet hair and dirt floating around, which often results in unpleasant odors and aggravated allergies.

Professional carpet cleaning can help contribute to better indoor air quality by ensuring your carpet or flooring aren't part of the problem. Addressing your indoor air is one of the biggest favors you can do for people who have asthma or are prone to allergies. In fact, according to the Environmental Protection Agency (EPA), indoor air pollution ranks as one of the top five environmental risks to public health since 1990.


Enhance the Appearance of your Home

A carpet is one of the treasures of a home. Finding the ideal carpet takes a huge priority. As a perfect floor covering not only makes the place cozy but also enhances your available space. One task that is overlooked is cleaning them regularly. Possibly with time, your carpet can accumulate dust and may lose its attractiveness. The dull appearance may spoil the overall look of your home.

Hiring professional carpet cleaners will do the job. They do more than just cleaning your carpet. Any tough, unusual stains, they are quick to attend and will leave your carpet clean and spotless all over again. A clean carpet can be a positive feature and will enhance the appearance of your home's interior.


Removes dust mites and bedbugs that may have found a home in carpets.

Carpet mites, also known as dust mites, are small bugs that are so tiny a microscope is required to see them. When an area is vacuumed, these mites can stir into the air. Mites can easily irritate those who are prone to allergies or have breathing problems and are especially sensitive to those who have dust-specific allergies. To fully and effectively remove the mites from the carpet , you need to have them professionally cleaned. Thorough, detail-oriented carpet cleaning process can help make these pests history.


Maintains the carpet's warranty.

Most carpet warranties require that carpets be cleaned using the extraction method within a specific amount of time, usually every 12 to 18 months.

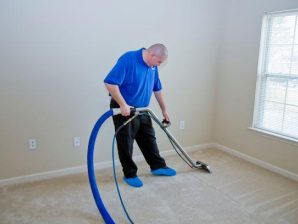
Many carpet manufacturers recommend steam cleaning as the preferred method of carpet cleaning. The steam cleaning method rids the carpets of deep embedded stains and prolongs the life of the carpet.

Look for a carpet cleaning company that uses commercial quality cleaning equipment and cleans to the Australian standards.


Wednesday, December 30, 2020

Plaster Ceiling Repair Contractors

The good news is, it's possible to repair and rescue plaster ceilings from further damage. We have successfully reattached many old ceilings by injecting adhesive between the plaster and lath where the keys (anchors) have broken away over time. Though variations of this technique are not new--texts from the 1920s recommend liquid sulfur as an adhesive--we use modern materials that are easy to handle and inflict minimal damage to sound plaster. With these methods and good tool skills it's possible to restore the integrity of plaster ceilings for many more years of service.

Sizing up the Ceiling

Stained cracks and suspicious shadows the telltale signs of a delaminating plaster ceiling.

After correcting whatever problem made the ceiling loose in the first place (leaky roof, structural alterations), the first step is to assess how far the ceiling has pulled away. Gently push on the surface and judge the amount of play between plaster and lath. Hopefully, you will feel it move back into place like a jigsaw puzzle piece sliding into its own unique spot.

If there are broken keys or debris in the way, the plaster will resist seating, and it will feel and sound "crunchy" akin to breaking eggshells or crushing popcorn. Do not force it back into place or more plaster may break. Instead, just gently encourage the plaster with the flat of your hand. If the separation is slight say, between 1/4" and 1/2" good reattachment is likely because the plaster will usually push back into place solid and flat against the lath. 

Remove the Plaster Debris

Unless you can vacuum out all this debris from above, reattachment is probably not an option. Often we find that the worst part of the ceiling has too much debris, and we have to remove this section, reattach the edges, then infill the lost parts with new plaster. 

Plaster that is soft and crumbly will not hold up during the pushing and drilling and has to be removed as well.


Removing areas of damaged plaster particularly in a ceiling will encourage more plaster to come down, especially if you use a chisel-edged tool. To control the plaster from crumbling and breaking up by removing any areas with a sharp utility knife. Mark with a lumber crayon or pencil; a pen will bleed through your paint later on.


Drill Injection Holes Into The Plasterboard

We bore injection holes with a 1/4" carbide drill bit. Making these holes presents a second challenge because it is very important to bore only through the injection surface. For example, if you are reattaching from the plaster side, you must bore completely through the plaster, yet stop before going into the wood lath.

The 1/4" injection hole is an effective size for a good seal with the adhesive tube.

Conversely, if you are reattaching from above, you need to bore through the lath, but stop before the plaster. By paying attention to the changing resistance of the materials on the drill bit, it's possible to develop a feel for these different layers.

Clean Up The Plaster Dust Again

After you have bored your injection holes, you need to vacuum out the debris and drilling dust. Older plaster is soft, so be careful not to suck it off the ceiling with the vacuum! Place your hand near the hole to gently support the plaster while you vacuum using the other hand. Do not push the plaster back up into place, however; the void will allow the vacuum to pull some of the debris out through the hole.

If you have access from above, you can vacuum more of the silt and debris. Remove keys that are visibly loose or broken as well. Use a wet/dry shop vacuum designed to handle the fine dust. Plaster will kill a household vacuum in short order. Next, wet the injection holes by either spraying down the lath with a squirt bottle or squirting up into the drilled holes from the plaster surface. Wetting encourages the adhesive to travel farther when it is compressed and will also slow the drying time slightly for a stronger bond.

Inject The Plaster Adhesive To Contiue the Ceiling Repair

Finally it's time to inject adhesive. We use a water-based, latex product that is actually a vinyl floor adhesive. However, any good-quality latex or acrylic adhesive can work (for example, Liquid Nails or floor adhesive). You can purchase these products at construction supply houses and hardware stores in caulking tubes for small projects or five-gallon pails for large jobs.

We use a caulking gun with the tip cut to fit snugly in our 1/4" holes, and inject the adhesive until the plaster moves ever so slightly (one squeeze of the average caulking gun is usually enough). If you inject too much adhesive you will actually push the plaster off the ceiling. As you inject, follow along with a damp sponge to wipe away the excess adhesive that leaves the holes when you remove the nozzle.

Adding wire lath over wood lath improves an infill repair.

Complete your entire series of holes, then go back over the plaster with a clean, damp sponge to remove further glue residue. Follow the same process if you're working on the lath side, leaving adhesive wipe-up as an optional step.

Secure The Plaster With Forms

Once we have injected adhesive into the repair area, we push the plaster back into place against the lath and secure it with forms. This step spreads the adhesive so that it bonds to a greater surface area.

We use flexible plywood squares (1/2" to 3/8" thick) covered with a layer of sheet polyethylene. Do not underestimate the importance of this layer of poly; if you forget it you will glue the plywood to the ceiling and take all the plaster with it if you attempt to remove the form. (Sound like first-hand experience?) Last, we secure these in place with screws or wood shores running to the floor, then allow the adhesive to set up for 24 hours.

Screws Versus Shores

Screws save the time of fitting wooden shores and keep the work area clear, but they can damage the plaster and leave more holes to fill later. Shores are more appropriate for fragile, decorative, or museum-quality plaster, and we use them for both plaster-side and lath-side reattachment.

Remove The Forms

The next day you can remove the forms. Where some of the plastic sticks to adhesive injected from the plaster side, simply scrape it off with a putty knife. The adhesive is still soft around the holes at this point, but has set up enough to remove the forms. On the plaster side, scrape off the dried adhesive residue with a drywall or putty knife, then use the corner of a putty knife to gently scallop out excess adhesive showing from the hole.

Fill the Injection & Screw Holes

As with all good restorations, a successful repair is hard to see.

As it dries fully over another day or so (depending on heat and humidity) the adhesive will further retreat into the hole, leaving a clear space to fill. We usually fill the injection and screw holes with Durabond 45 (sandable), mixed to the consistency of peanut butter, because this product has a quick set-up time and dries very hard with minimal shrinkage. However, any vinyl paste filler or plaster/joint compound can be used for this step. Usually, it takes two to three applications to fill the holes flush with the ceiling, depending upon the product. Other than this, the ceiling is now reattached and ready for a skim-coat of plaster or a fresh coat of paint.

How to Repair Plaster Cracks

Old-house walls often fail through no fault of their own. Use these tips to correctly repair the cracks in your old home.


SHEETROCK  Plasterboard

Offering light and easy installation, SHEETROCK® plasterboards are up to 15% lighter than USG Boral Standard Core Plasterboards, easier to score and snap and superior on sag resistance.

Fire-resistance rated ceilings

The most common ceiling that contributes to fire-resistance ratings in commercial and residential construction is the dropped ceiling . In the case of a dropped ceiling, the rating is achieved by the entire system , which is both the structure above, from which the ceilings is suspended, which could be a concrete floor or a timber floor, as well as the suspension mechanism and, finally the lowest membrane or dropped ceiling. Between the structure that the dropped ceiling is suspended from and the dropped membrane, such as a T-bar ceiling or a layer of drywall , there is often some room for mechanical and electrical piping, wiring and ducting to run.

An independent ceiling, however, can be constructed such that it has a stand-alone fire-resistance rating. Such systems must be tested without the benefit of being suspended from a slab above in order to prove that the resulting system is capable of holding itself up. This type of ceiling would be installed to protect items above from fire.

Distinctive Ceilings And Ceiling Panels


Now, with our diversified approach, clients may deal with just one major ceiling contractors. Our commitment to researching new and innovative products means you will always receive the very best products at competitive prices and extensive range .Our satisfied customers come from a wide range of markets including residential, commercial, insurance, home improvement and upper market homes. Able to respond quickly and decisively when repairs and maintenance need to be done in a hurry, we have earned the trust and respect of a number of major insurance Brisbane plastering contractors.

More Than Just Switchboard Upgrades

If your home has an old-style fuse box it probably has old wiring throughout the building too. Even though electrical wiring is usually tuck...